Öljypohja, öljyn pumppaaminen ja voitelu
Re: Öljypohja, öljyn pumppaaminen ja voitelu
Hyvä pointti, saattaa olla, että asiaa lyhyesti sivuttiin early-alustaspektaakkelissa mutta ei noin havainnollistettuna. PutJetissä oli tietenkin vakiopohja ja kun öljyä oli shop manualin määrä, niin Ahvenistolla mekaaninen öljypainemittari näytti suolenkillä 0:aa. Litra lisää, niin ei pudonnut nollaan. Tiedä sitten, millä korkeudella öljy oli suhteessa kampiakseliin ja paljonko se vatkasi vaahtoa. Nyt harmittaa, että ostin Cantonin 7 litran pohjan enkä sitä, missä on fläpit pumpun pick-upin ympärillä. Tosin väliäkö sillä, ei ainakaan tänä vuonna vahingoittunut yhtään lisää.
Re: Öljypohja, öljyn pumppaaminen ja voitelu
Ei oo unohdettu ja on hieman muitakin varmistuksia tehty öljynkierron hallitsemiseksi.
1. öljykanavien muotoilu ja kohdistaminen
2. öljykanavien tulpat vaihdettu NPT kierretulpiksi
3. blue printattu race öljypumppu, säädettävää mallia (säätö kokemuksella haettu noin 60 psi kuumalle (80 - 90 C) öljylle / 6000 rpm)
4. race malin öljypohja, jossa loiskelevyt ja porteilla varustettu pic up kaukalo + 7 litran öljytilavuus + kaapia öljypohjan reunassa
5. parempi pic up
6. kaapia kampiakselille
7. öljyn jäähdytin
8. nopea öljynpaine mittari mekaaninen + 30 psi öljynpaine valoanturi + öljyn lämpömittari
9. vain kaikkein parhaimpia kilpa öljyjä DRIVEN / Delron / Amsoil
10. riittävän usein öljyn ja suodattimen vaihto
11. ym.
- Liitteet
-
-
-
-
-
65 "Shelby" Mustang GT 350, FIA Race Car
67 Mustang HT "Trans Am"
Norton Commando 750 S -70
Money can´t buy happiness, but it can buy a race car. And I´ve never seen a sad person in a race car.
67 Mustang HT "Trans Am"
Norton Commando 750 S -70
Money can´t buy happiness, but it can buy a race car. And I´ve never seen a sad person in a race car.
-
1223
- Addikti
- Viestit: 445
- Liittynyt: 29 Touko 2004, 00:25
- Auto: 66 HT 289+T5
65 K-CODE avo
62 Falcon 3d wagon
Re: Öljypohja, öljyn pumppaaminen ja voitelu
Moi
302 boss öljypohjaa kannattaa käyttää jos haluaa vakion ulkonäön.
Se on juurikin tuollainen etusumpullinen mitä Kaara edellisessä viestissä laittoi eikä ole kallis.
302 boss öljypohjaa kannattaa käyttää jos haluaa vakion ulkonäön.
Se on juurikin tuollainen etusumpullinen mitä Kaara edellisessä viestissä laittoi eikä ole kallis.
Viimeksi muokannut 1223, 22 Marras 2019, 22:10. Yhteensä muokattu 1 kertaa.
Re: Öljypohja, öljyn pumppaaminen ja voitelu
Small Block-Ford Lubrication Parts Interchange
https://www.diyford.com/small-block-for ... terchange/
https://www.diyford.com/oiling-system-i ... d-engines/
https://www.diyford.com/small-block-for ... terchange/
https://www.diyford.com/oiling-system-i ... d-engines/
65 "Shelby" Mustang GT 350, FIA Race Car
67 Mustang HT "Trans Am"
Norton Commando 750 S -70
Money can´t buy happiness, but it can buy a race car. And I´ve never seen a sad person in a race car.
67 Mustang HT "Trans Am"
Norton Commando 750 S -70
Money can´t buy happiness, but it can buy a race car. And I´ve never seen a sad person in a race car.
Re: Öljypohja, öljyn pumppaaminen ja voitelu
Öljy pumppu lienee yksi tärkeimmistä osista, joka pitää koneen voitelun haluttuna. Vähän niin kuin sydän, joka pitää koneen hengissä.
Ford pikkulohkoon on saatavilla laaja valikoima eri valmistajien ja erilaisilla standard volume, standard pressure, hi-volyme, hi-pressure pumppuja. Mikä on oikea sinulle?
Hinta haitari on myös melko suuri $ 29 - 160. Mikä maksaa?
Asiaa kannattaa ajatella, vaikka näin; olen tekemässä konetta ja kokonaiskustannus tulee olemaan esim. 10 000€ (lienee aika lähellä tuollaisen 331 - 347 stroker koneen kustannus) onko järkevää säästää öljypumpussa?
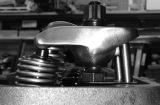
Minä olen noissa omissa koneissa käyttänyt noita Precison Oil Pump tuoteita, sen uskaltaa laitaa paikoilleen yleensä ilma purkamista (itse olen purkanut ja tarkastanut nekin varmuuden vuoksi).
Oil pumps should never be installed right out of the box. Marvin McAfee of MCE Engines in Los Angeles stresses the importance of blueprinting every oil pump because you should never assume a pump has integrity right out of the box. Blue-printing isn’t only an engine consideration, it’s vital to every part of an engine build. Oil pumps are mass produced and not foolproof. They may have flaws and machining errors that go unnoticed until you encounter oil pressure and volume issues.
Precision Oil Pumps
Product Description
Blueprinted Melling 10687 Ford 302, 5.0 Standard Volume Race Pump. Fits all 289, 302,5.0.
A MELLING STANDARD-VOLUME BLUEPRINTED RACE OIL PUMP.The pump is a brand new Melling 10687 Race Pump Blueprinted by PRECISION OIL PUMPS. Fits all Ford 260,289,302,5.0,Boss 302 engines. Each pump is disassembled in groups of ten for production purposes. All passages have casting flash removed, corners radiused and polished to Increase Flow. The Housings & Gears are then Deburred by a vibratory polisher to Reduce Wear and Cavitation. The Gears are the prepared and sprayed with TECH-LINE moly-coating to Reduce Friction or HP Loss. Three Critical Clearances are checked on reassembly;(1) Gear to Housing, (2) Mesh or Backlash, (3) Gear to Cover-Plate. With Ten gear sets to choose from , One pair with correct clearances will be installed. The relief- valve is De-burred with emmory cloth to insure smooth operation ,cleaned and is re-installed with the existing spring and new hardware. Each cover plate is also Vibratory Polished, cleaned and fastened with safety-wired aircraft bolts. The 302, 5.0 race pump features additional use of a 460 style center gear and cover plate which provides support at both ends of the gear for extra strength for high RPM applications. Another feature over the M-68 is that the race pump features a threaded valve plug to prevent the plug from coming out. This also makes removing the valve and spring for pressure changes or inspection very simple. All pumps are bench tested.
nyt
Ford pikkulohkoon on saatavilla laaja valikoima eri valmistajien ja erilaisilla standard volume, standard pressure, hi-volyme, hi-pressure pumppuja. Mikä on oikea sinulle?
Hinta haitari on myös melko suuri $ 29 - 160. Mikä maksaa?
Asiaa kannattaa ajatella, vaikka näin; olen tekemässä konetta ja kokonaiskustannus tulee olemaan esim. 10 000€ (lienee aika lähellä tuollaisen 331 - 347 stroker koneen kustannus) onko järkevää säästää öljypumpussa?
Minä olen noissa omissa koneissa käyttänyt noita Precison Oil Pump tuoteita, sen uskaltaa laitaa paikoilleen yleensä ilma purkamista (itse olen purkanut ja tarkastanut nekin varmuuden vuoksi).
Oil pumps should never be installed right out of the box. Marvin McAfee of MCE Engines in Los Angeles stresses the importance of blueprinting every oil pump because you should never assume a pump has integrity right out of the box. Blue-printing isn’t only an engine consideration, it’s vital to every part of an engine build. Oil pumps are mass produced and not foolproof. They may have flaws and machining errors that go unnoticed until you encounter oil pressure and volume issues.
Precision Oil Pumps
Product Description
Blueprinted Melling 10687 Ford 302, 5.0 Standard Volume Race Pump. Fits all 289, 302,5.0.
A MELLING STANDARD-VOLUME BLUEPRINTED RACE OIL PUMP.The pump is a brand new Melling 10687 Race Pump Blueprinted by PRECISION OIL PUMPS. Fits all Ford 260,289,302,5.0,Boss 302 engines. Each pump is disassembled in groups of ten for production purposes. All passages have casting flash removed, corners radiused and polished to Increase Flow. The Housings & Gears are then Deburred by a vibratory polisher to Reduce Wear and Cavitation. The Gears are the prepared and sprayed with TECH-LINE moly-coating to Reduce Friction or HP Loss. Three Critical Clearances are checked on reassembly;(1) Gear to Housing, (2) Mesh or Backlash, (3) Gear to Cover-Plate. With Ten gear sets to choose from , One pair with correct clearances will be installed. The relief- valve is De-burred with emmory cloth to insure smooth operation ,cleaned and is re-installed with the existing spring and new hardware. Each cover plate is also Vibratory Polished, cleaned and fastened with safety-wired aircraft bolts. The 302, 5.0 race pump features additional use of a 460 style center gear and cover plate which provides support at both ends of the gear for extra strength for high RPM applications. Another feature over the M-68 is that the race pump features a threaded valve plug to prevent the plug from coming out. This also makes removing the valve and spring for pressure changes or inspection very simple. All pumps are bench tested.
nyt
65 "Shelby" Mustang GT 350, FIA Race Car
67 Mustang HT "Trans Am"
Norton Commando 750 S -70
Money can´t buy happiness, but it can buy a race car. And I´ve never seen a sad person in a race car.
67 Mustang HT "Trans Am"
Norton Commando 750 S -70
Money can´t buy happiness, but it can buy a race car. And I´ve never seen a sad person in a race car.
-
1223
- Addikti
- Viestit: 445
- Liittynyt: 29 Touko 2004, 00:25
- Auto: 66 HT 289+T5
65 K-CODE avo
62 Falcon 3d wagon
Re: Öljypohja, öljyn pumppaaminen ja voitelu
Mistä löydän öljypumpun blueprint arvot?
Re: Öljypohja, öljyn pumppaaminen ja voitelu
http://performanceunlimited.com/oilpump ... rview.html
Step 1. Completely disassemble the pump, inspecting every piece for unusual machining marks, burrs or casting irregularities. This includes the removal of the plug that secures the oil pressure spring (pry it out or drill a small hole and use a slide hammer to remove it)
Step 2. Secure the pump housing in a vice with soft jaws, and carefully radius and blend the oil port with a Dremel or porting tool. The port-to-block exit should be ported out to the diameter of the gasket.
Step 3. Mic the thickness of the two rotors and lap the thickest piece on 180-grit wet/dry sandpaper until the two pieces are matched in thickness.
Step 4. Install the rotors in the housing and check the clearances as follows: rotor to rotor .003" to .006"; rotor to housing end .002" to .004"; rotor to housing, internal .006" to .011".
Use a rotary flapper wheel to increase clearance on the inside of the outside rotor to increase clearance on housing for the outside rotor or to increase clearance on housing for the outside rotor. To decrease clearance on rotor to housing end, lap housing on 180 grit wet/dry sandpaper. Do the same to increase clearance except sand the rotors. Take your tim, and check clearances often. It's a lot easier to take more off than to add it back. Make sure the sandpaper is on a flat surface and use generous amounts of water or cutting oil.
Step 5. Once the proper clearances are set, use a dremel or high-speed rotary file and put a slight chamfer on the edges of the rotors, both top and bottom.
Step 6. If you have the bucks and the time have the rotors coated with one of the slick processes provided by HPC or Poly Dyn. This will significantly improve the life of the oil pump. If you are a road racer this is particularly important to you.
Step 7. Lap the inside surface of the end plate on 280 grit wet/dry sandpaper secured to a flat surface. Alternately, valve lapping compound on a flat steel plate or thick piece of glass can be used. It is very important to get this piece smooth and flat.
Step 8. Clean all pieces thoroughly with Tide soap and a bottle brush. Flush all pieces with plenty of water, then rinse with clean varsol or spray with a water displacing fluid like WD-40.
Step 9. Reinstall the stock oil pressure spring. Shimming the end with two (2) 3/8" SAE washers. This will bring the oil pressure up to 100 PSI cold. A new plug should be installed. These are generally available at any aut parts store that carries Dorman Freeze Plugs.
Step 10. Reassemble the rotors, coating each generously with petroleum jelly. This will ensure immediate priming.
Step 11. Install the end plate using grade 12 bolts that have been drilled for safety wire. Safety wire the bolt heads.
Step 12. Clean the pump-to-block mating surfaces with lacquer thinner. Install the pump to block with a new gasket using grade 12 studs with nuts and bolts that have been drilled for safety wire. When installing the oil pump be sure to include a new competition oil pump driveshaft. This is cheap insurance against high-rpm failure.
The oil pump driveshaft has a retainer disc on the distributor end that prevents the shaft from being pulled out of the pump when the distributor is removed. Failure to observe the correct installation procedure (retainer end into distributor shaft) will become apparent the first time you attempt to remove the distributor and the shaft takes a bath in the oil pan. When the pump and shaft have been properly fastened, recheck the pump shaft one last time and then safety wire the pump to the block nuts and bolts.
- Liitteet
-
65 "Shelby" Mustang GT 350, FIA Race Car
67 Mustang HT "Trans Am"
Norton Commando 750 S -70
Money can´t buy happiness, but it can buy a race car. And I´ve never seen a sad person in a race car.
67 Mustang HT "Trans Am"
Norton Commando 750 S -70
Money can´t buy happiness, but it can buy a race car. And I´ve never seen a sad person in a race car.
Re: Öljypohja, öljyn pumppaaminen ja voitelu
Ja ei pidä unohtaa öljypumpun akselia, alkuperäinen tuntuu tosi heppoiselta. Ainakin mun mielestä. 
