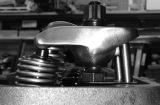
venttiilin jouset
venttiilin jouset
kansissa on tällähetkellä tuplajouset mitkä ovat erittäin jäykät asennus paine n 130 kg mutta nokka akselissa on tulossa suhkot mieto nokka.onko liian jäykistä venttiilin jousista haittaa 


lbs / 2.2 = kilograms
kg x 2.2 = pounds
130 kg = 286 lbs?
286 lbs asennuspaine? Vai oliko sitenkin niin, että asennuspaine onkin
130 lbs = 59.1 kg ?
kg x 2.2 = pounds
130 kg = 286 lbs?
286 lbs asennuspaine? Vai oliko sitenkin niin, että asennuspaine onkin
130 lbs = 59.1 kg ?
65 "Shelby" Mustang GT 350, FIA Race Car
67 Mustang HT "Trans Am"
Norton Commando 750 S -70
Money can´t buy happiness, but it can buy a race car. And I´ve never seen a sad person in a race car.
67 Mustang HT "Trans Am"
Norton Commando 750 S -70
Money can´t buy happiness, but it can buy a race car. And I´ve never seen a sad person in a race car.

KLIKfoord kirjoitti:minkä laiset venttiili välykset kannattaa laittaa 88v malliseen hudrauli rolleri nokalle. olisiko joku 0.45 välys hyvä
Tuon linkin läpilukeminen saattaa helpottaa hydraili nostajilla varustetun koneen venttiilien säätöä.
http://www.cranecams.com/?show=faq&id=3
http://www.cranecams.com/?show=faq&id=3
65 "Shelby" Mustang GT 350, FIA Race Car
67 Mustang HT "Trans Am"
Norton Commando 750 S -70
Money can´t buy happiness, but it can buy a race car. And I´ve never seen a sad person in a race car.
67 Mustang HT "Trans Am"
Norton Commando 750 S -70
Money can´t buy happiness, but it can buy a race car. And I´ve never seen a sad person in a race car.
Olen joskus antanut itselleni ymmärtää, että jäykemmillä jousilla ei merkittävää tehonhukkaa tulisi, sillä aina on jossain joku jousi ns. laskevalla rampillla nokilla, siis työntämässä ja kun toisaalta jossain taas joku jousi on puristumassa kasaan. Tällöin tulisi jonkulainen kompensaatio, ja ylimääräistä tehoa ei tarvita.GT-350 kirjoitti:Mitä jäykemmät jouset sitä enemmän ja nopeammin venttiilikoneisto kaikkinensa kuluu. Maalaisjärjellä ajateltuna haittaa voi olla myös tehomielessä. Kannattaa noudattaa nokan valmistajan kyseiselle tuotteelleen antamia arvoja.
Yksittäiset nokat yms ovat sinänsä kovemmalla rasituksella tietenkin
snadissa skidissä
Tuo on ok linkki, mutta tuossakin ohjeessa , kuten monessa muussa netissä löytvässä, on mielestäni tiettyä misinformaatiota, eli sellaiseen tapaukseen mm kun on uudet tyhjät nostajat, ei tuo säätötapa ole oikea. Esim Mustin korjausmanuaalissakin on kerrottu tyhjien nostajien säätö, jolloin jätetään keinuvivun välykseksi venttiiliin 0.060" . siis tyhjän nostajan kuppi pohjaan painettuna.Mexico65 kirjoitti:Tuon linkin läpilukeminen saattaa helpottaa hydraili nostajilla varustetun koneen venttiilien säätöä.
http://www.cranecams.com/?show=faq&id=3
Jos tietämätön tai tottumaton sanatarkasti tuon linkin ohjeen mukaan säätää, pohjaa kupit, on ne sen verran heikot ne kupin jouset, ja minkäänlaista "hydraulivaraa" nostajiin ei jää, venttiilit jää kantamaan. Homma menee tietenkin tuon mukaan, kun nostajat on öljyissään, jo pyöritetyssä koneessa
Lisäksi tuossa on kerrottu, että nostajat voisi muka pumpata täyteen öljyssä liottamalla , ja kuppia painelemalla
snadissa skidissä
Mun mielestä Cranen ohje toimii hyvin. Perusteet on oikein, mutta itse teen pari juttua toisella tapaa:
- en vahdi imu/pakoventiilien aukeamista/sulkeutumista erikseen. Käännän koneen 1:n yläkuolokohtaan, jolloin sen sylinterin molemmat venttiilit ovat kiinni. Säätö, ja koneen pyöritys 1/4 kierrosta kampiakselilta, sytytysjärjestyksessä seuraavan sylinterin säätö (taas molemmat venttiilit) jne sytytysjärjestys loppuun asti
- en pyörittele tikkuja. Mutteria kääntämällä ja keinuvipua heiluttelemalla löydän kyllä sen kohdan, kun välys on pois. Löytyy niinkin tarkasta tällä tapaa, että mutteria ei tarvitse kääntää kuin ehkä 10 astetta niin on pienenpieni välys, vs. ei välystä. Siitä sitten 1/2 kierrosta kiinni.
Laahaavat nostajat on helppo esitäyttää öljyllä; nostaja lautasen päälle pystyyn, öljyä retainerin päällekin ja tippakannulla kyljen reiästä öljyä sisään samalla kun vaikka vanhalla työntötangolla painelee nostajaa. Öljy menee sisään ja ilma tulee ulos...jo on kohta kivikovat. Rullanostajalla ei onnistu ihan tällä tavalla, kun karkaa alta pois mutta onnistuu nekin esim. vaakatasossa rulla seinää vasten. Tosin Cranekaan ei suosittele.
Adjusting Hydraulic Lifters for Proper Preload
In order to adjust the preload the lifter must be properly located on the base circle or ?Heel? of the lobe. At this position the valve is closed and there is no lift taking place. You will need to watch the movement of the valves to determine which lifter is properly positioned for adjusting.
1. Remove the valve covers, and pick a cylinder you are going to set the preload on.
2. Hand rotate the engine in its normal direction of rotation and watch the exhaust valve on that particular cylinder. When the exhaust valve begins to open, stop and adjust that cylinder?s intake rocker arm. (Why? Because when the exhaust valve is just beginning to open, the intake lifter will be on the base circle of the lobe, the correct position for adjusting the intake.)
3. Back off the intake rocker arm adjuster and remove any tension from the pushrod. Wait a minute or two for that hydraulic lifter to return to a neutral position. The spring inside the lifter will move the pushrod seat up against the retaining lock if you give it time to do so. (If you are installing brand new lifters they will be in the neutral position when they come in the box.)
4. Now spin the intake pushrod with your fingers while tightening down the rocker arm. When you feel a slight resistance to the turning of the pushrod, you are at ?Zero Lash?. Turn the adjusting nut down one half to one full turn from that point. Lock the adjuster into position. The intake is now adjusted properly.
5. Continue to hand turn the engine, watching that same intake. It will go to full open and then begin to close. When it is almost closed, stop and adjust the exhaust rocker arm on that particular cylinder. (Again, when we see the intake almost closed, we are sure that exhaust lifter is on the base circle of the lobe.) Loosen the exhaust rocker arm and follow the same procedure described before in steps 3 and 4 to adjust this rocker arm.
6. Both valves on this cylinder are now adjusted, and you can move on to your next cylinder and follow the same procedure again.
Do Hydraulic Lifters Need to be Primed with Oil?
Many people mistakenly believe that hydraulic lifters must be soaked in oil overnight and be hand pumped up with a pushrod before installing into a new engine, however this is not necessary. In fact, this could cause the lifter to act as a ?solid? and prevent obtaining proper preload. What is very necessary is the priming of the entire engine?s oil system before starting up a new engine for the first time. This is done by turning the oil pump with a drill motor to force oil throughout the entire engine. Crane Cams offers oil pump primers for Chevrolet and Ford engines.
*****
1965 Suomi-FB GT-350 look-alike FOR SALE!
*****
1965 Suomi-FB GT-350 look-alike FOR SALE!
*****
nyt etsin sellaisia neuvoja kuinka kannattaa säätää hydrauli rolleri nokka venttiilin välykset sillai että moottoria ei tarvitse käyttää koska moottori tilassa on sen verran vähän tilaa ja se ei onnistu käydessä koska on vaarana että työkalut tippuisivat venttiilikoneistoonGT-350 kirjoitti:Mun mielestä Cranen ohje toimii hyvin. Perusteet on oikein, mutta itse teen pari juttua toisella tapaa:
- en vahdi imu/pakoventiilien aukeamista/sulkeutumista erikseen. Käännän koneen 1:n yläkuolokohtaan, jolloin sen sylinterin molemmat venttiilit ovat kiinni. Säätö, ja koneen pyöritys 1/4 kierrosta kampiakselilta, sytytysjärjestyksessä seuraavan sylinterin säätö (taas molemmat venttiilit) jne sytytysjärjestys loppuun asti
- en pyörittele tikkuja. Mutteria kääntämällä ja keinuvipua heiluttelemalla löydän kyllä sen kohdan, kun välys on pois. Löytyy niinkin tarkasta tällä tapaa, että mutteria ei tarvitse kääntää kuin ehkä 10 astetta niin on pienenpieni välys, vs. ei välystä. Siitä sitten 1/2 kierrosta kiinni.
nes.
.minä säädin venttiilin välykset 030 mutta se on hieman liikaa tarvitsee olla vähemmän